


Cannabis cultivation involves many intricate steps, but one of the most critical processes is the proper drying and curing of weed. These stages are essential not only for preserving the potency and aroma of your harvest but also for enhancing its flavor and ensuring a smooth consumption experience. When weed is dried correctly, excess moisture is removed, reducing the risk of mold and degradation. Following this, curing allows natural chemical processes to occur, which further refine the product’s taste and overall quality.
This guide is designed to walk you through every step of the drying and curing process. Whether you are a beginner or an experienced cultivator, you’ll find practical tips, best practices, and troubleshooting advice to help you achieve the optimal quality in your final product. From preparing your harvest to ensuring proper storage, this ultimate guide covers all aspects necessary for maximizing the benefits of your cannabis crop.
Essential Basics of Drying and Curing Weed
What Is Drying Weed?
Drying weed is the process of gradually reducing moisture content in freshly harvested cannabis buds. This step is crucial for preventing mold growth and achieving the ideal texture for curing. By carefully controlling temperature and humidity, proper drying helps preserve cannabinoids and terpenes, ensuring a smoother and more flavorful final product.
What Is Curing Weed?
Curing weed is the post-drying process of storing dried buds in controlled conditions—typically in airtight containers—to allow further chemical development. This slow process helps break down chlorophyll and evenly redistribute moisture throughout the buds, enhancing their flavor, aroma, and overall potency.
Why Are Drying and Curing Important?
Proper drying and curing are essential for maximizing the quality of your cannabis. These processes:
- Enhance Flavor and Aroma: They allow terpenes to fully develop, resulting in a richer taste and smell.
- Improve Potency: Gradual curing can increase the overall effectiveness of cannabinoids.
- Ensure a Smooth Experience: The right moisture levels prevent harshness during consumption.
- Extend Shelf Life: By reducing moisture and preventing mold, properly cured weed can be stored safely for a longer period.
How to Harvest and Prep Your Weed?
The quality of your cannabis begins with proper harvesting and preparation. Harvest your weed at the optimal time—typically when the trichomes shift from clear to a milky or amber hue—to ensure peak potency and flavor. Once harvested, gently trim away excess leaves to enhance airflow around the buds without damaging the delicate trichomes.
Next, set up an ideal drying environment. Aim for a controlled space with a temperature of around 60-70°F (15-21°C) and humidity levels near 50-60%, coupled with adequate ventilation. Using the right tools—such as sharp scissors, drying racks, and sealed containers for curing—will help you maintain quality throughout the drying and curing process.
How Do You Properly Dry Your Weed?
Proper drying is a crucial step in preserving the flavor, potency, and overall quality of your cannabis. A well-executed drying process prevents mold, maintains cannabinoid integrity, and sets the stage for a successful curing phase.
By carefully setting up your environment, selecting the appropriate drying method, and monitoring the process closely, you can ensure that your weed dries evenly and maintains its quality. This detailed attention during the drying phase lays a strong foundation for an effective curing process, ultimately enhancing the overall experience of your cannabis. Below is a detailed guide on how to dry your weed effectively.
Setting Up the Environment
- Temperature: Maintain a steady temperature of around 60-70°F (15-21°C). Too high a temperature can degrade cannabinoids and terpenes, while too low may slow down the drying process.
- Humidity: Aim for a relative humidity level of 50-60%. This range allows moisture to evaporate slowly and evenly, reducing the risk of mold or over-drying.
- Ventilation: Ensure that the drying area is well-ventilated. Good airflow helps carry away excess moisture, but avoid direct, strong winds that could dry the buds too rapidly or unevenly.
- Lighting: A dark or dimly lit environment is ideal. Excess light, especially direct sunlight, can degrade some of the delicate compounds in cannabis.
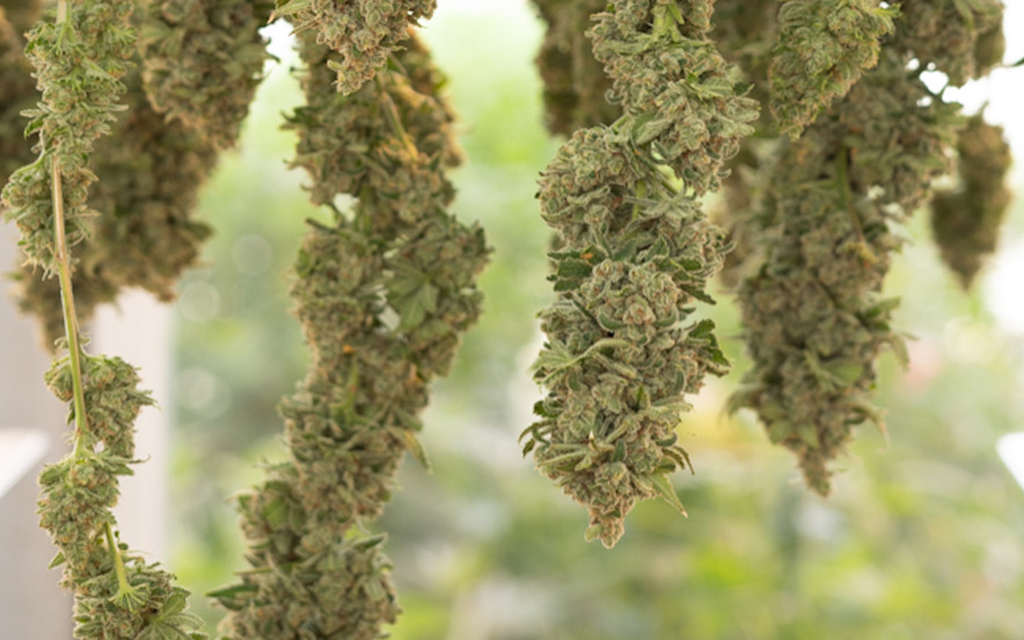
Selecting the Drying Method
- Hanging Method: One of the most common approaches is to hang the entire branches upside down. This method allows for uniform drying of buds while preserving their structure.
- Rack or Tray Drying: For smaller buds or trimmed flowers, laying them out on drying racks or trays can be effective. Ensure the buds are spread out in a single layer and not touching to allow for even airflow.
Monitoring the Drying Process
- Daily Checks: Inspect your buds every day. Look for signs of dryness such as a slight crispness on the outer edges of the buds while the inside remains pliable.
- Time Frame: The drying process usually takes between 5 to 14 days, depending on the environmental conditions and the density of the buds. Patience is key—rushing this process can compromise quality.
- Adjustments: If you notice any signs of mold or uneven drying, adjust the airflow or humidity. You might need to reposition the buds or modify the environment slightly to ensure consistency.
Signs of Proper Drying
- Texture: The buds should feel dry on the outside yet retain a bit of moisture inside. When you gently squeeze a bud, it should not release any moisture, but still have some pliability.
- Appearance: Properly dried cannabis typically exhibits a matte finish rather than a glossy one. The leaves and buds will have a more subdued, less vibrant appearance compared to fresh harvest.
- Smell: The aroma of your weed should remain rich and aromatic. A musty or overly damp smell may indicate that the drying process was too slow or that humidity levels were too high.
How Do You Know When Your Weed Is Ready for Curing?
Once the drying process is complete, transitioning to curing is the next crucial step to preserve and enhance the quality of your cannabis. But how do you know when your weed is properly dried and ready for curing?
Checking for Proper Dryness
- Stem Test: Gently bend a small stem—if it snaps rather than bends, your buds are ready for curing. If it still feels flexible, they need more drying time.
- Bud Texture: The outer layer should feel dry, but the inside should retain slight moisture. Overly dry buds can become harsh when smoked, while too much moisture can lead to mold during curing.
Preparing for the Curing Process
- Trimming (If Not Done Earlier): If you dried your buds on full branches, now is the time to trim away excess stems and leaves to improve aesthetics and airflow in curing jars.
- Selecting Storage Containers: Use airtight glass jars (such as mason jars) to begin the curing process. These containers provide the right balance of air exchange while protecting against excess moisture loss.
Moving Buds into Jars
Once your buds pass the dryness test, gently place them in jars, filling about 75% full to allow some air circulation. Avoid overpacking, as this can restrict airflow and lead to mold issues. Close the lids tightly to begin the curing process.
This careful transition ensures that your cannabis retains its potency, aroma, and smoothness while preventing mold or over-drying. Now, the curing phase will take your weed to the next level of quality.
How Do You Properly Cure Your Weed?
Curing is a slow, controlled process that allows cannabis to develop its full aroma, flavor, and potency. By carefully managing moisture levels and airflow within airtight containers, you can enhance the overall smoking or vaping experience while extending shelf life.
By following this process, you’ll achieve a smoother, more aromatic, and potent final product—one that truly highlights the best characteristics of your cannabis.
Step 1: Storing Buds in Airtight Jars
Place your dried buds into glass jars, filling them about ¾ full to leave enough room for air circulation. Mason jars are the most commonly used option, as they prevent excessive moisture loss while maintaining freshness.
Step 2: Burping the Jars
For the first 1-2 weeks, open the jars at least once or twice a day for a few minutes to release built-up humidity and allow fresh air to enter. This prevents mold growth while slowly reducing internal moisture.
- If the buds feel too moist or stick together, leave the jar open for an hour before resealing.
- If they feel overly dry, consider adding a humidity control pack (e.g., Boveda) to maintain optimal moisture levels.
Step 3: Long-Term Curing
After the initial two weeks, continue burping the jars every few days for another 2-4 weeks. Over time, chlorophyll breaks down, reducing the harshness of the smoke and enhancing the smoothness and aroma.
Step 4: Determining When Curing Is Complete
While cannabis can be smoked after a couple of weeks, curing for at least 4-8 weeks produces the best results. Some growers even cure for several months to maximize flavor and potency.